TSDoc文档
TypeDoc 是一款 TypeScript 文档生成工具,它能够读取你的 TypeScript 源文件,对其进行语法分析,根据其中的类型标注与注释内容,自动为你的代码生成包含文档内容的静态网站。甚至可以通过API Extractor生成SDK文档。
选择 TypeDoc 主要有以下理由:
- 充分利用了
TypeScript的编译能力,文档内容并不是完全依赖注释,TypeScript的原生类型标注也将成为文档的重要内容。 - 注释符合官方的 tsdoc 标准规范。
- 可拓展性强,有许多插件可以满足可能产生的个性化需求。typedoc 插件
TSDoc 的三个组成部分,如下:
- 采用 TSDoc 规范编写代码注释
- api-extractor 分析代码注释生成文档模型
- api-documenter 解析文档模型生成接口文档
TSDoc 主要包含上面三大步:TSDoc 规范、api-extractor、api-documenter,文档模型也叫做 Doc Model,一般是一个 json 文件:包含了源码中 TSDoc 规范的相关定义
api-extractor 是一个单独的 npm 包,需要单独安装:
$ npm i -D @microsoft/api-extractor
使用之前需要初始化生成配置文件 api-extractor.json
$ npx api-extractor init
然后使用即可,具体用法可查看官方文档
$ api-extractor run
api-documenter 是一个单独的 npm 包,需要单独安装:
$ npm i -D @microsoft/api-documenter
转换 *.api.json 文档模型文件为 markdown 文件:
$ npx api-documenter markdown
"scripts": {
  "doc": "npx api-extractor run --local && api-documenter markdown -i temp -o docs/api && node docs/build.js"
}
步骤
- 抽取 npx api-extractor run --local
- 变成markdown文档 npx api-documenter markdown -i temp -o docs/api
- 编译成html并启动http服务端。 node docs/build.js
文档编写
选用的是metalsmith,一个基于 NodeJS 开发的超级简单、插件化的静态网站生成工具。之所以没有选harp、hexo、docsify,vitepress,docusaurus这些大大有名的,是因为它们都太重了,安装包比较大,内置功能较多。
metalsmith却恰恰相反,比如jsdoc就是用它编写的,参考https://github.com/jsdoc/jsdoc.github.io/blob/master/gulpfile.js。
示例
下面是官方的例子,代码如下
import { fileURLToPath } from 'node:url'
import { dirname } from 'node:path'
import Metalsmith from 'metalsmith'
import collections from '@metalsmith/collections'
import layouts from '@metalsmith/layouts'
import markdown from '@metalsmith/markdown'
import permalinks from '@metalsmith/permalinks'

const __dirname = dirname(fileURLToPath(import.meta.url))
const t1 = performance.now()

Metalsmith(__dirname)         // parent directory of this file
  .source('./src')            // source directory
  .destination('./build')     // destination directory
  .clean(true)                // clean destination before
  .env({                      // pass NODE_ENV & other environment variables
    DEBUG: process.env.DEBUG,
    NODE_ENV: process.env.NODE_ENV
  })
  .metadata({                 // add any variable you want & use them in layout-files
    sitename: "My Static Site & Blog",
    siteurl: "https://example.com/",
    description: "It's about saying »Hello« to the world.",
    generatorname: "Metalsmith",
    generatorurl: "https://metalsmith.io/"
  })
  .use(collections({          // group all blog posts by internally
    posts: 'posts/*.md'       // adding key 'collections':'posts'
  }))                         // use `collections.posts` in layouts
  .use(markdown())            // transpile all md into html
  .use(permalinks({           // change URLs to permalink URLs
    relative: false           // put css only in /css
  }))
  .use(layouts())             // wrap layouts around html
  .build((err) => {           // build process
    if (err) throw err        // error handling is required
    console.log(`Build success in ${((performance.now() - t1) / 1000).toFixed(1)}s`)
  });
说明如下。
- source和destination,和gulp用法类似
- use插件做法,和koa中间用法类似
使用已有插件
import layouts from "@metalsmith/layouts";
...
.use(
    layouts({
      default: "layout.hbs",
      directory: "./docs/layouts",
      engineOptions: {
        helpers: {
          formattedDate: function (date) {
            return new Date(date).toLocaleDateString();
          },
        },
      },
    })
  )
布局文件layout.hbs里需要留好contents插槽。
<!DOCTYPE html>
<html>

<head></head>

<body>
  {{{ contents }}}
</body>

</html>
其他就是前端熟悉的内容了。
扩展插件
扩展插件是一个非常使用的功能,比如我想把文件中的.md替换.html,代码如下。
.use(function snapshot(files, metalsmith) {
    // console.log(metalsmith);
    // console.log(files);
    for (const [key, value] of Object.entries(files)) {
      console.log(`   - ${key}`);
      files[key]["contents"] = Buffer.from(
        files[key]["contents"].toString().replaceAll(".md", ".html"),
        "utf-8"
      );
    }
  })
启动
在构建函数里,启动http服务即可。
.build((err) => {
    // build process
    if (err) throw err; // error handling is required
    console.log(
      `Build success in ${((performance.now() - t1) / 1000).toFixed(1)}s`
    );

    // Serve up public/ftp folder
    var serve = serveStatic("dist/docs", {
      index: ["index.html", "index.htm"],
    });

    // Create server
    var server = http.createServer(function onRequest(req, res) {
      serve(req, res, finalhandler(req, res));
    });

    // Listen
    server.listen(3001);

    console.log("creat server success. http://127.0.0.1:3001");
  });
以上为Nodejs最简单的http static服务代码。
在做这个地方技术选型的时候,有考虑过serve和http-server、node-static,它们都还是包比较大,使用起来也略微麻烦。结合本课程以入门为主,所以采用node内置的http服务。
执行
$ node docs/build.js
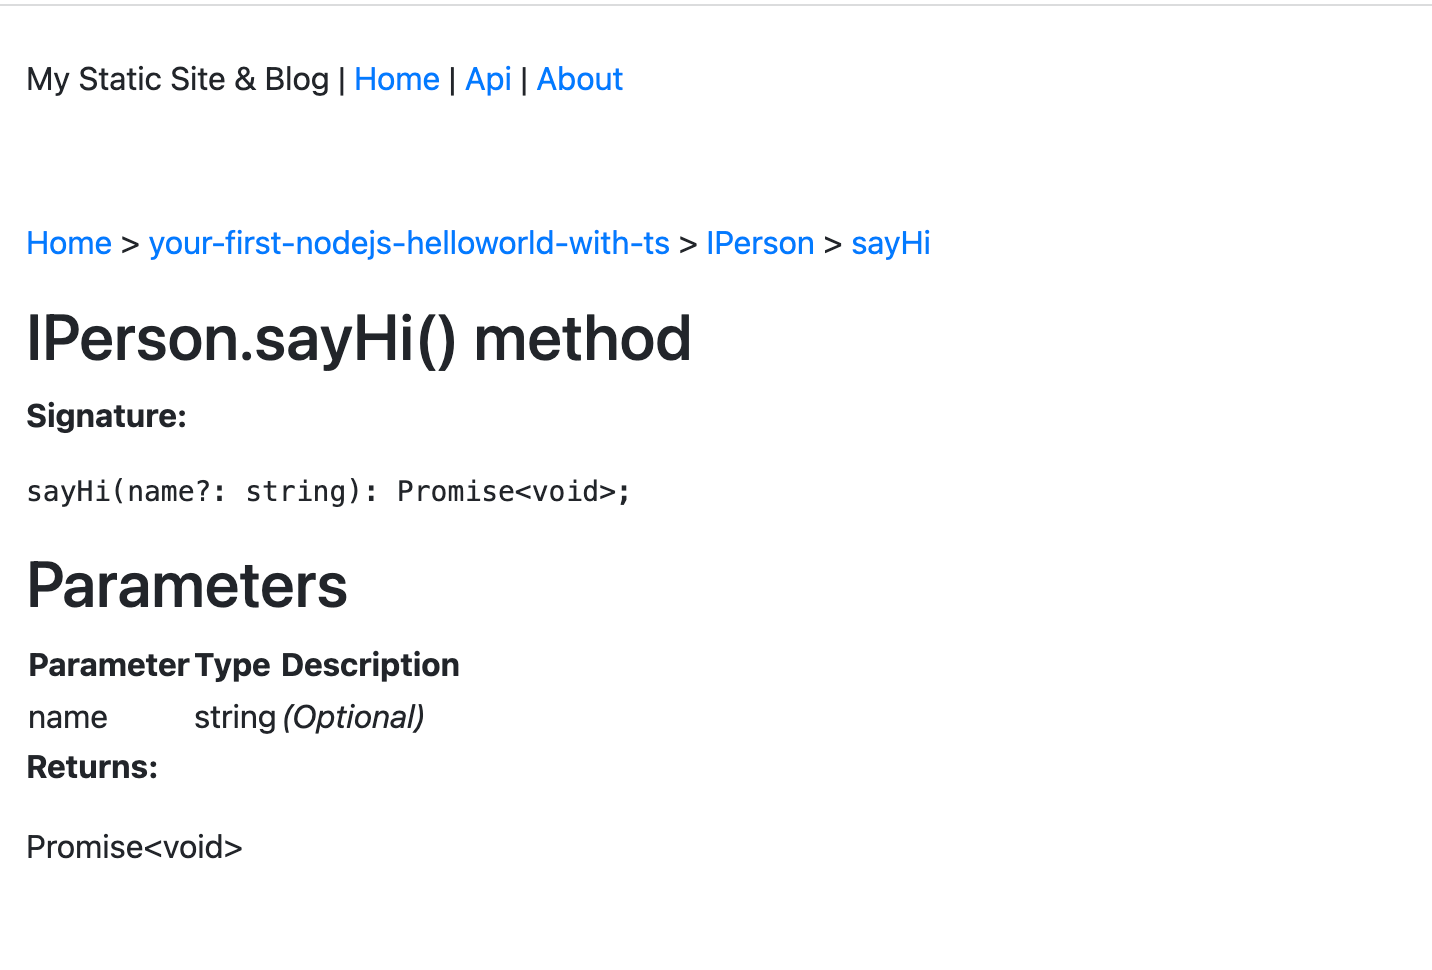
- .DS_Store
- about.md
- api/index.md
- api/your-first-nodejs-helloworld-with-ts.iperson.md
- api/your-first-nodejs-helloworld-with-ts.iperson.sayhi.md
- api/your-first-nodejs-helloworld-with-ts.md
- build.js
- css/style.css
- index.md
- layouts/default.hbs
- layouts/layout.hbs
- layouts/post.hbs
Build success in 0.1s
creat server success. http://127.0.0.1:3001