1.4、第一个Node.js v20项目
学习任何技术,最好的方式都是从Helloworld开始,能够把Helloworld做到极致,标准,内聚,其实也是非常难的。
下面我们就来一起看一下第一个Node.js v20项目如何编写吧。
要点
推荐做法,能使用现代Web规范的地方尽量使用。
1、使用ESM规范,作为模块加载方案,掌握import和export就可以
2、使用import xx from ‘node:xxx’调用
3、配置package.json中的"type": "module",使用.js后缀进行开发
4、使用Async函数作为异步流程方案,如果必须要使用Promise
初始化项目
通过npm init -y创建项目
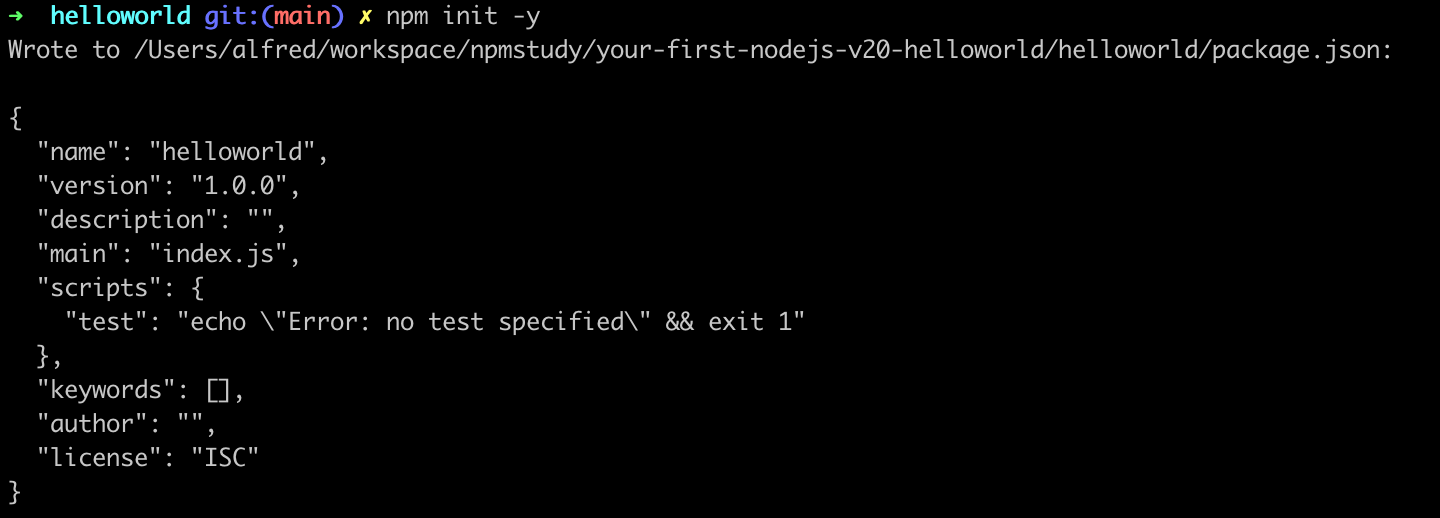
这是npm默认创建的package.json,此时并没有配置ES模块信息。需要手动编写,增加"type": "module"。此时,package.json文件内容如下。
{
  "name": "helloworld",
  "version": "1.0.0",
  "description": "",
  "type": "module",
  "main": "index.js",
  "scripts": {
    "test": "echo \"Error: no test specified\" && exit 1"
  },
  "keywords": [],
  "author": "",
  "license": "ISC"
}
创建index.js
为了演示方便,我们采用之前的代码。
// 定义一个异步函数
async function sayHi(name) {
  try {
    // 调用Promise函数
    const text = await helloworld(name);
    console.log(text);
  } catch (error) {
    console.log(error);
  }
}

// 调用Promise函数
function helloworld(name) {
  return new Promise(function (resolve, reject) {
    resolve(`Hello ${name}!`);
  });
}

// 调用异步函数
const person = process.argv[2];

sayHi(person);
执行如下。
$ node index.js alfred
'Hello alfred!'
参考
- https://nodejs.dev/en/learn/run-nodejs-scripts-from-the-command-line/
- https://github.com/75lb/command-line-args
- https://github.com/75lb/command-line-usage
发布npm
前置条件是npmjs.com上注册并登录.
修改package.json如下
{
  "name": "node-v20-helloworld",
  "version": "1.0.5",
  "description": "",
  "type": "module",
  "main": "index.js",
  "bin": {
    "node-v20-helloworld": "index.js"
  },
  "scripts": {
    "test": "echo \"Error: no test specified\" && exit 1"
  },
  "keywords": [],
  "author": "npmtudy",
  "license": "ISC",
  "files": [
    "index.js"
  ],
  "engines": {
    "node": "^20"
  }
}
说明
- bin 是配置cli名称的配置。
- files 是发布的npm包里包含的内容,比如测试之类的只在开发阶段使用,真正的npm包里可以移除掉。
- engines 用于限制node版本,比如这里的配置就是Node.js v20以上才能安装。
然后执行npm publish就可以正常发布,如果不能发布,可以通过npm verion进行调整,比较常用的就是修复问题,通过patch来修改最后一位的版本号。
$ npm version patch
v1.0.6
测试
Node.js诞生自2009年,在v18之前的13年时间里都没有内置任何测试框架。一直都是使用npm生态。像本书系列卷三中提到的几个测试框架,都已经有5年以上的历史了。
| 测试框架 | 当前主要版本 | 年限 |
|---|---|---|
| mocha | v10 | 11 |
| tap | v16 | 11 |
| tape | v5 | 10 |
| ava | v5 | 9 |
| jest | v27 | 7 |
Node.js遵循与JavaScript本身相同的"最小核心"原则。因此,像代码检查工具、代码格式化工具和测试运行器这样的工具最好作为第三方工具提供。虽然这是一个很好的想法很长一段时间,但现在没有标准测试工具的任何语言都显得有些奇怪。Deno、Rust和Go - 它们都有自己内置的测试运行器。
在Node.js v18开始内置了测试框架,在Node.js v20版本中,已经被标记为Stable能力,大家可以放心使用。
我们可以创建一个index.test.js文件,文件里的测试代码如下。
import { test } from "node:test";
import assert from "node:assert";

import { sayHi } from "./index.js";

test("test if works correctly", function (t) {
  const log = t.mock.method(global.console, "log");

  assert.strictEqual(log.mock.callCount(), 0);
  // call hello world say method
  sayHi("liangqi");

  assert.strictEqual(log.mock.callCount(), 1);
});
由于我们在测试代码文件引入了index.js中的sayHi,因此要在index.js文件中给该函数加上export
export async function sayHi(name) {
  ...
}
在package.json中修改npm scripts
"scripts": {
    "test": "node --test"
},
其中--test命令行标志指示Node.js自动寻找以.test.js为结尾的文件,并执行其中的测试代码。
执行测试结果如下。
$ npm test

> node-v20-helloworld@1.0.6 test
> node --test

Hello liangqi!
✖ test if works correctly (1.703916ms)
  AssertionError [ERR_ASSERTION]: Expected values to be strictly equal:

  0 !== 1

      at TestContext.<anonymous> (file:///Users/alfred/workspace/npmstudy/node-v20-helloworld/index.test.js:13:10)
      at Test.runInAsyncScope (node:async_hooks:206:9)
      at Test.run (node:internal/test_runner/test:581:25)
      at Test.start (node:internal/test_runner/test:494:17)
      at startSubtest (node:internal/test_runner/harness:207:17) {
    generatedMessage: true,
    code: 'ERR_ASSERTION',
    actual: 0,
    expected: 1,
    operator: 'strictEqual'
  }

ℹ tests 1
ℹ suites 0
ℹ pass 0
ℹ fail 1
ℹ cancelled 0
ℹ skipped 0
ℹ todo 0
ℹ duration_ms 59.11425

✖ failing tests:

✖ test if works correctly (1.703916ms)
  AssertionError [ERR_ASSERTION]: Expected values to be strictly equal:

  0 !== 1

      at TestContext.<anonymous> (file:///Users/alfred/workspace/npmstudy/node-v20-helloworld/index.test.js:13:10)
      at Test.runInAsyncScope (node:async_hooks:206:9)
      at Test.run (node:internal/test_runner/test:581:25)
      at Test.start (node:internal/test_runner/test:494:17)
      at startSubtest (node:internal/test_runner/harness:207:17) {
    generatedMessage: true,
    code: 'ERR_ASSERTION',
    actual: 0,
    expected: 1,
    operator: 'strictEqual'
  }
竟然报错了!这就很莫名奇妙,方法调用都是对的,断言也没问题。
后经过排查,发现sayHi是Async函数,在测试方法里,没有使用await来对接。需要修改2处。
- test("test if works correctly", async function (t) {}),第二个参数,需要修改为Async函数,这是因为await外层必须是async函数。
- sayHi("liangqi") 方法需要改成await sayHi("liangqi"),这样异步方法就转换为同步方法了。
将代码修改如下
import { test } from "node:test";
import assert from "node:assert";

import { sayHi } from "./index.js";

test("test if works correctly", async function (t) {
  const log = t.mock.method(global.console, "log");

  assert.strictEqual(log.mock.callCount(), 0);
  // call hello world say method
  await sayHi("liangqi");

  assert.strictEqual(log.mock.callCount(), 1);
});
此时,执行npm test
$ npm test

> node-v20-helloworld@1.0.6 test
> node --test

Hello liangqi!
✔ test if works correctly (1.092375ms)
ℹ tests 1
ℹ suites 0
ℹ pass 1
ℹ fail 0
ℹ cancelled 0
ℹ skipped 0
ℹ todo 0
至此,就完成了测试的基本步骤,只有CI/CD我们在后面进阶章节进行讲解。
模块用法
npm上的模块分2种。
- 普通模块,主要是为import from使用的。
- 二进制模块,主要是为了编写命令行Cli工具使用的。
下面分别进行演示。
方式1:通过二进制模块方式测试
$ npm i -g node-v20-helloworld
$ node-v20-helloworld liangqi
'Hello liangqi!'
方式2:代码调用
$ npm i --save node-v20-helloworld
调用代码如下,一定要注意await,上面测试部分有见过坑,不可偷懒。
#! /usr/bin/env node
import { sayHi } from 'node-v20-helloworld';

async function main(){
 // 调用异步函数
 const person = process.argv[2];

 await sayHi(person);
}

main();